
“Revealed” is featured on the Street Anatomy blog today. Vanessa Ruiz, the author of Street Anatomy, gave me a lot of advice getting this blog started. She continues to check with me regularly and offers me new tips. I could not have done this without her and would like to thank her for introducing my blog to the Street Anatomy audience. To see the featured entry, go here.
Archive for March 24th, 2008
Revealed on Street Anatomy
Posted by Janet on March 24, 2008
Posted in announcements | Leave a Comment »
Ear Prosthesis Part 4
Posted by Janet on March 24, 2008
The next step in the process–making of the final product, can be best referred to as intrinsic coloring. It is called intrinsic coloring because the color agents are mixed into the material itself and is therefore more permanent than extrinsic coloring, in which the color is painted on top of the material. In this process, the material that makes up the bulk of the prosthesis is mixed with substances for coloring and texture, painting onto the mold in layers, and oven cured. The method presented here is only one of a few methods used to color the ear.
I started first by making a base color, a semi-opaque skin-toned mixture to use for the bulk of the prosthesis. A platinum silicone elastomer, a transparent colorless substance with the consistency of molasses, is mixed with some kaolin clay for increased opacity. Primary colors are gradually added until the color matches the base color of skin fairly well. The base color is determined by looking at the “underlying-most” layer of color on a person’s skin; it is the color you would see on a person’s skin if the skin is stripped of any coloration due to blood vessels, moles, freckles, etc. Occasionally, white pigment is added to increase opacity. Other pigments that closer resemble skin tones can also be added, but is it not necessary to do so. Flocking, short colored fibers, are also added for subtle color change and to texturize the mixture. Tiny red fibers from the flocking can mimic capillaries very well.


Above: Mixing kaolin into silicone, silicone coloring, flocking, and the final base color.
Several other colors mixtures are made to resemble different colors that make up the ear. A small amount of white and yellow was added to a separated portion of the base to make a cartilage color. Three more transparent colors–red, gold, and green, were made the same way but kept transparent by leaving out kaolin clay and white pigments. These colors will be used for the helix and other areas of the ear where capillaries are more prominent, a golden undertone overlying parts of the skin, and shaded areas, respectively.
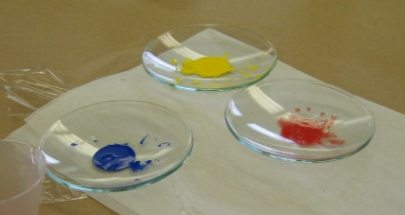
When all the colors are mixed, they are ready to be painted into the mold layer by layer. A catalyst is first added to the silicone and mixed well. The silicone is then placed on a piece of class and spread thinly for air removal. Afterwards, they are collected back into a small container and painted into the mold by using a paint brush. Each layer was lightly cured in an oven before the next layer was painted on. Occasionally I added flocking and tiny strands of colored yarn between layers to resemble small vessels. The order of which I painted the colors are red, gold, shade, and cartilage color. When everything else was completed, I closed the mold and filled the entire mold with the base color.

Above (cw from top left): Red layer (empty), gold layer, shade layer, base, cartilage color. Everything is sitting on top of glass. In the center, a spatula is being used to spread out a catalyzed red mixture for air removal.
The mold is then pressed tightly for the excess silicone to flow out. It is cured in an oven at 75 degrees Celcius for two hours.

Above: Two molds in a press. Paper towels were places above and below the molds for cushioning.
When the silicone is cured, the mold is removed from the oven and cooled to room temperature. It can be difficult to open the mold even with a separating agent between the pieces.
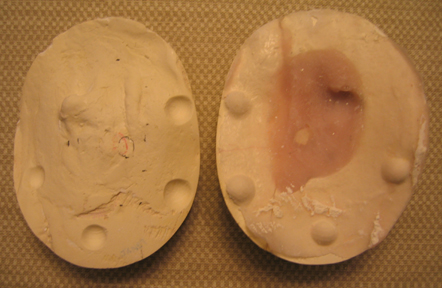

Above Left (Top): An open mold showing the back side of the ear.
Above Right (Bottom): The prosthetic ear as it was when completely separated from the mold.
The resulting ear was slightly yellower and greener than intended. Since the layers are painted in reverse order on the mold from outside in, it takes experience and experimentation to get a good match. For my ear, I will be trimming the excess material and refining the coloration using extrinsic colors later.
Posted in my projects, prosthesis | Tagged: ear, prosthesis, silicone | 3 Comments »
